Sharpening Chisels
and some comments on chisels
P. Michael Henderson
I teach hand cut dovetails and the students use my chisels to chop out the waste. So after each class, I have to go through my chisels and sharpen the ones the students used. Over the years, I've tried different techniques for sharpening and have settled on a technique which I find to be fast and produces an excellent edge.
I use certain equipment in the sharpening process, and while some of it is expensive, it's generally a once in a lifetime purchase.
Note that this is a way to keep your working chisels sharp. If you purchase antique chisels there's almost always a lot of additional work required to flatten the backs. I do not cover any of that - this is just a technique for keeping working chisels sharp.
Before I begin, let me first introduce the chisels because I'm going to make some comments about different brands of chisels as part of the discussion.
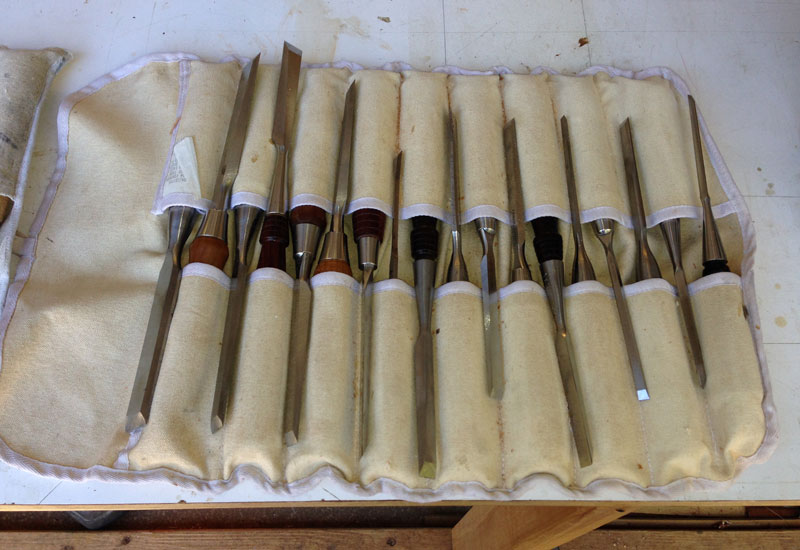
The first batch consists of a set of Lie Nielsen (LN) chisels, a set of Lee Valley (LV) chisels, and a set of no-name carbon steel chisels.

These are the ones most people gravitate towards. The LV chisels (PM-V11) retain their edge the longest. The LN A2 are next, and the carbon steel set gives up first.
The next batch is a set of Japanese laminated chisels. I've replaced the handles on this set with handles that are more "western" (no hoops) because I find traditional Japanese chisel handles uncomfortable.
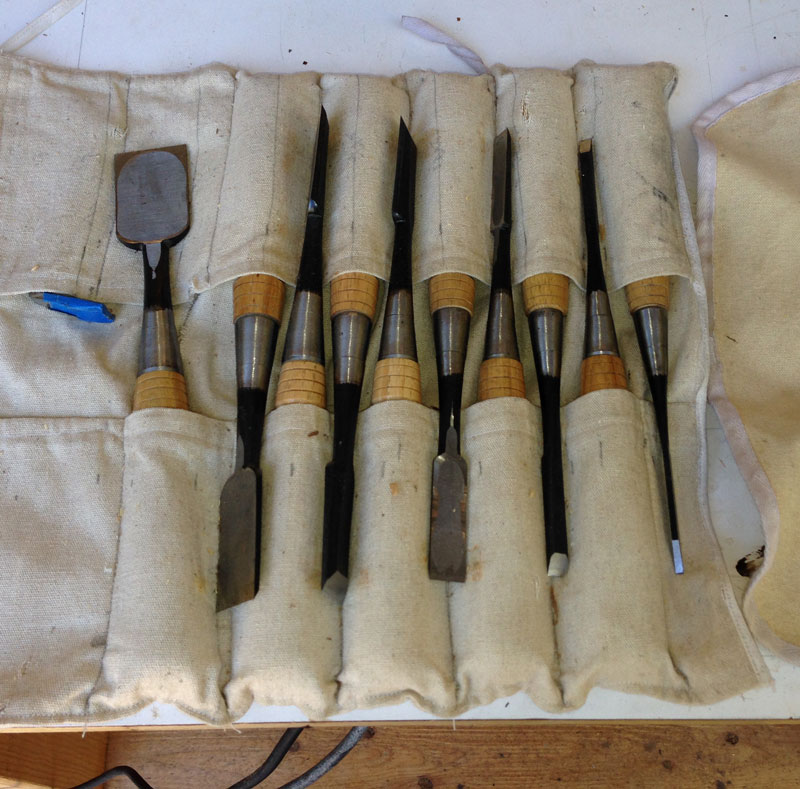
I encourage people to use the Japanese chisels so that they can compare them to the western chisels. They retain their edge very well, almost as well as the LV chisels, and probably as well as the LN chisels. I sharpen the Japanese chisels exactly the same as the western chisels (25 degree primary bevel plus a secondary bevel).
Most of the time, these are the two rolls of chisels I bring to class, because I've found over time that the edges hold up best on these chisels.
I used to bring the following vintage chisels but rarely do so any more.

This roll consists of a complete set of Swan chisels, marked either "Best Cast Steel" or "Best Tool Steel", and a set of Witherby chisels. These chisels tend to be longer than modern chisels and I found that students had problems working with them. I also found that the edges on these vintage chisels did not hold up nearly as well as the modern western chisels, or the Japanese chisels. The steel tends to be somewhat soft and the edges fail by rolling over, rather than chipping.
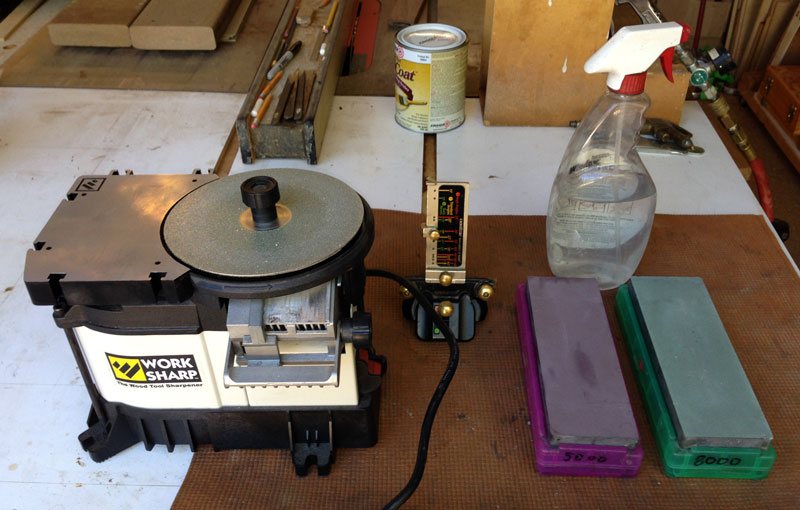
The equipment I use for sharpening is shown below:
1. A Worksharp 3000 with diamond lapping plates.
2. Shapton 5000 grit and an 8000 grit stones. Shapton stones do not need to be soaked in water. They only require a spritz of water when you use them.
3. A Lee Valley honing jig (I don't always use this).
4. A spray bottle of water.
5. A mat made from a cut down yoga mat - to keep the stones from sliding on the bench.
6. (not shown) A DMT coarse/extra coarse diamond stone, used to flatten the Shaptons.
A few comments about power sharpening.
I tried establishing the bevel on a regular 1725 RPM grinder but was not satisfied. I found it hard to get an accurate bevel angle and it was too easy to overheat the chisel edge, making the metal soft.
I tried a Tormek wet grinder but found that it made a mess. Water got all over everything and the Tormek plus the jigs were very expensive.
The WorkSharp is not perfect - it's kind of cheap in construction - but it's a dry grinder, it produces an accurate bevel angle, a flat bevel, and it doesn't generate enough heat to ruin the temper of a carbon steel chisel.
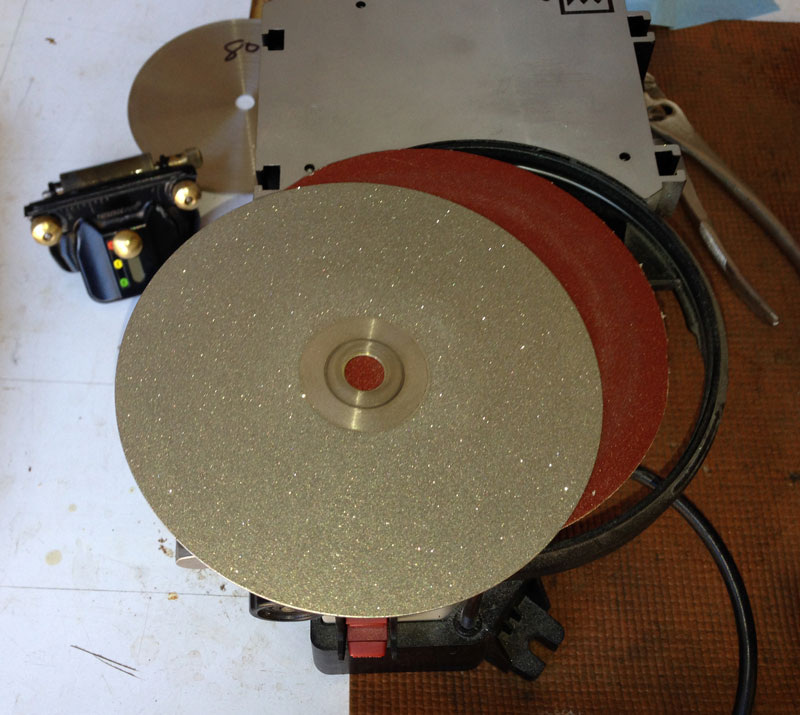
I used to use 6" PSA sanding disks on the WorkSharp but once I found the 6" diamond lapping disks I switched over and have been very satisfied. The disks are used in the lapidary trade and are cheap. I think I paid $12 each for the ones I bought. I tried different grits and settled on 180 grit as fast enough but didn't leave too rough an edge. And the diamond disks last a long time. The disk on top of the WorkSharp is 180 and you can see an 80 disk in the background. I marked the grit on the back of each plate. You can find them on Amazon or eBay. Search for 6" diamond lapidary disk.
I set the WorkSharp to 25 degrees.

Incidentally, you can adjust the ramp at the sharpening port to get a straight across grind. I found that I had to adjust mine when I first received it. There's only a small amount of adjustment possible and mine is almost all the way to one end.
To grind a chisel, you adjust the guide until it's against the chisel and push the chisel against the grinding wheel.
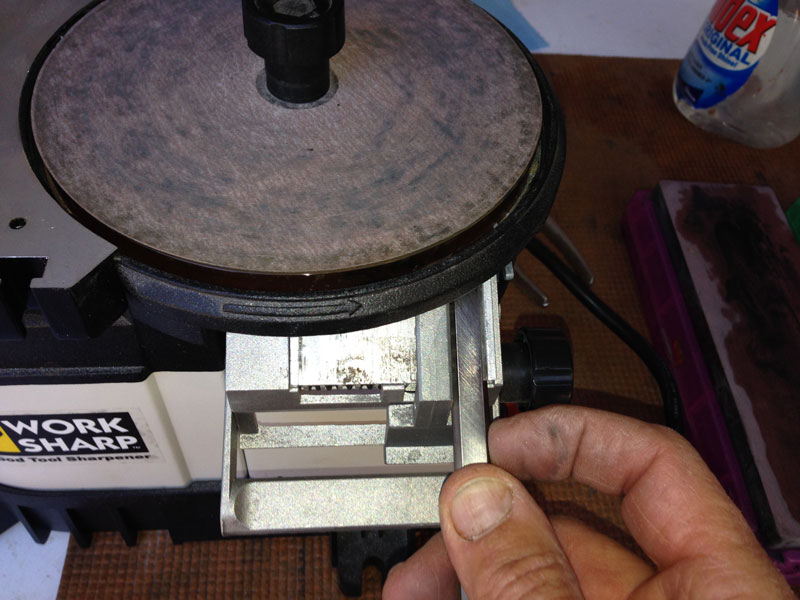
I normally only fully grind a chisel if the edge has been damaged. Otherwise, I grind it enough to reduce the size of the secondary bevel, as I did in the chisel in this picture.
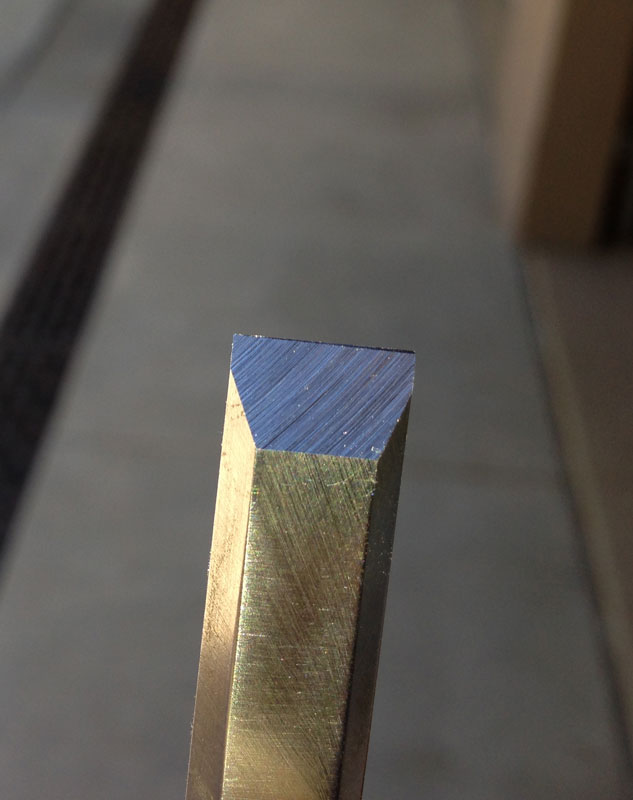
Then, I take the chisel to the 8000 stone and take a few swipes on the back.

Then freehand hone to produce a secondary bevel.

Sometimes, I'll use the LV honing guide, if I want to be absolutely sure of my bevel angle (30 to 35 degrees for chopping out dovetails).

The LV jig is good and bad. It produces an accurate secondary bevel but the knobs used to tighten down the jig to the chisel are too small - you can't get them tight enough with finger pressure. I have to take a pair of pliers to tighten them down. Wing nuts would be better. And when sharpening a narrow chisel, like a 1/8", you really have to crank down on the knobs or the chisel moves around. LV really needs to improve the design.
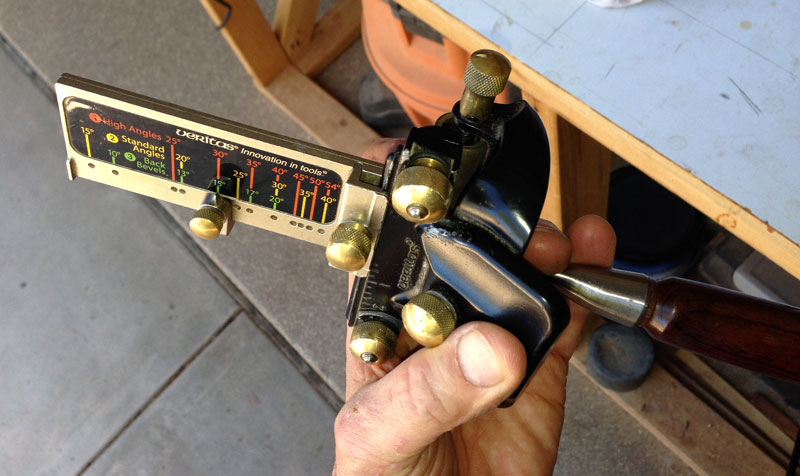
But whether freehand or with the jig, my goal is to produce a narrow secondary bevel of between 30 and 35 degrees on each chisel, western or Japanese.
Note that in the next picture, my secondary bevel is not exactly straight across. That's just from me inadvertently putting more pressure on one side of the chisel when putting the secondary bevel on. It'd be nice to have it straight across but a bit off, like this, doesn't affect the performance of the chisel.
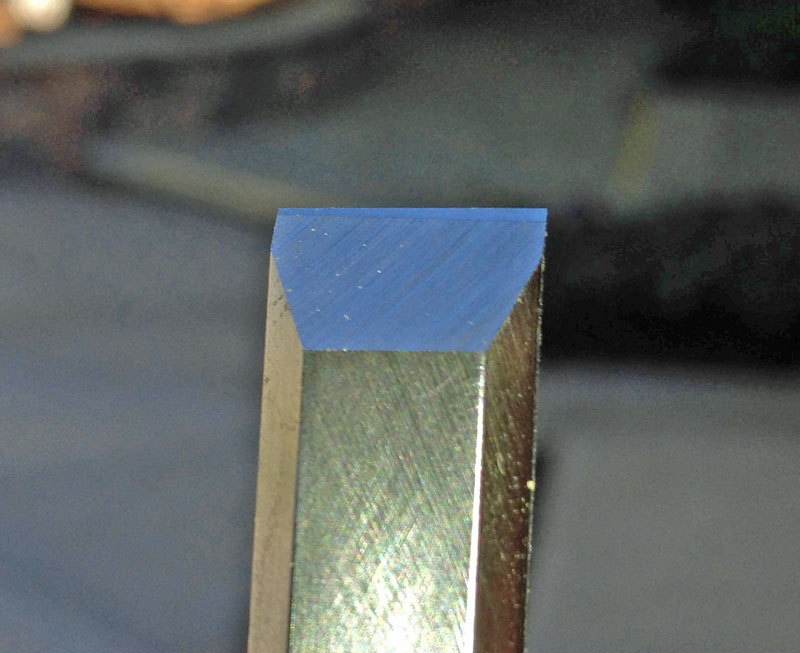
With this equipment and technique, I can go through a set of chisels and put a very good edge of each of them in a short amount of time.
Return to the main page