Carving a Simple Early American Fan
Continued
P. Michael Henderson
January 5, 2009
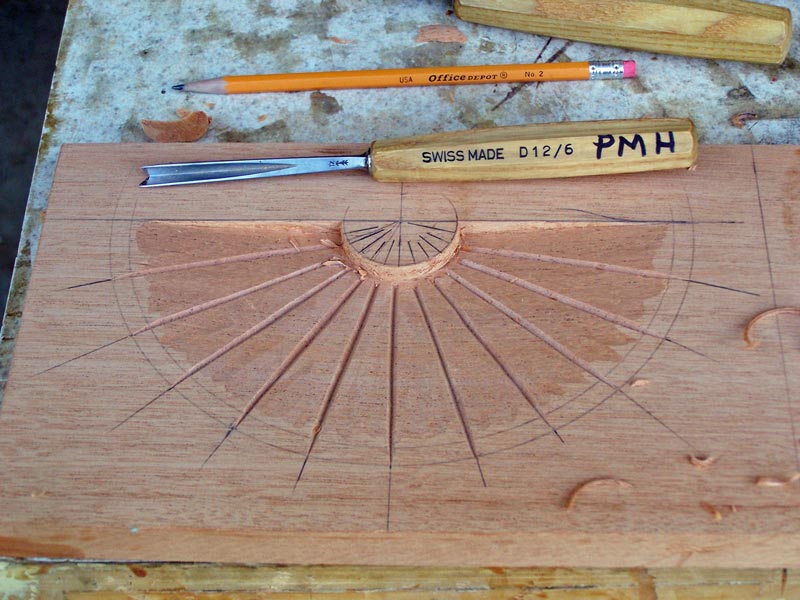
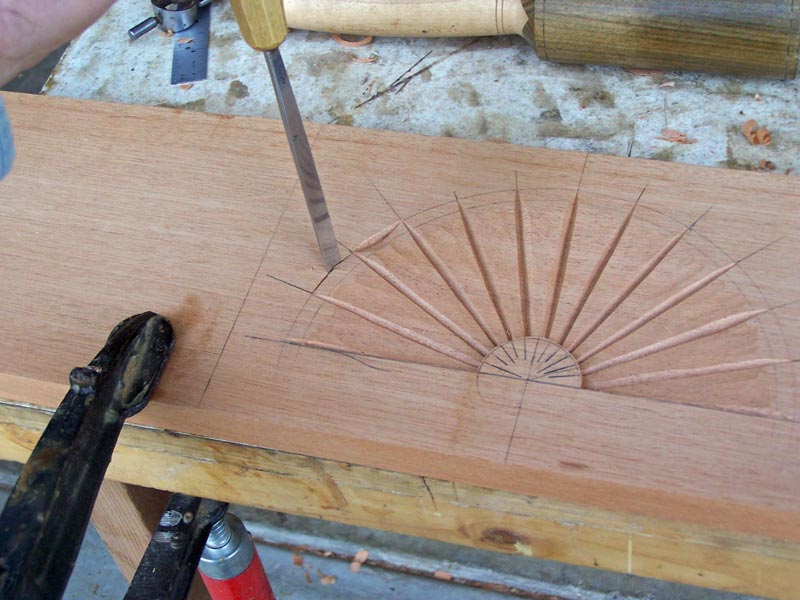
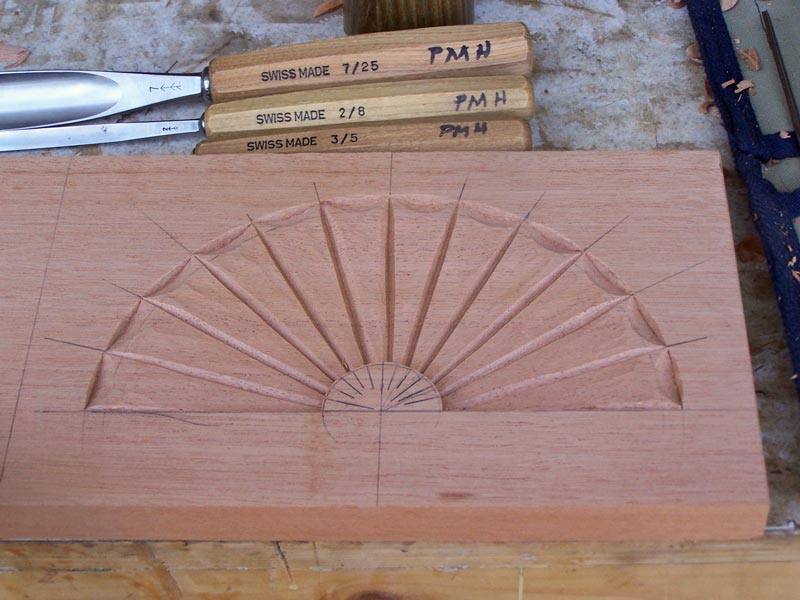
Use your V-tool to cut along the lines, from the outside circle to the inner half circle. When you cut the lower sides of the bottom flutes, you can't use the V-tool. You'd have to twist the V-tool to keep the lower side upright (because of the "wall" at the bottom) and that will cause the V-tool to cut too deeply against the lower flute. That side of the flute will not be "rounded" the same as the others. Rather than use a V-tool, I cut downward and inward to the "wall" with a fairly flat gouge, like a #2. You'd still make your stop cuts downward with a chisel or #1 gouge. That will allow you to round the lower side of the two bottom flutes so that they look like the other flute edges. I don't show those flutes trimmed in the picture below, but do show them trimmed in later pictures.
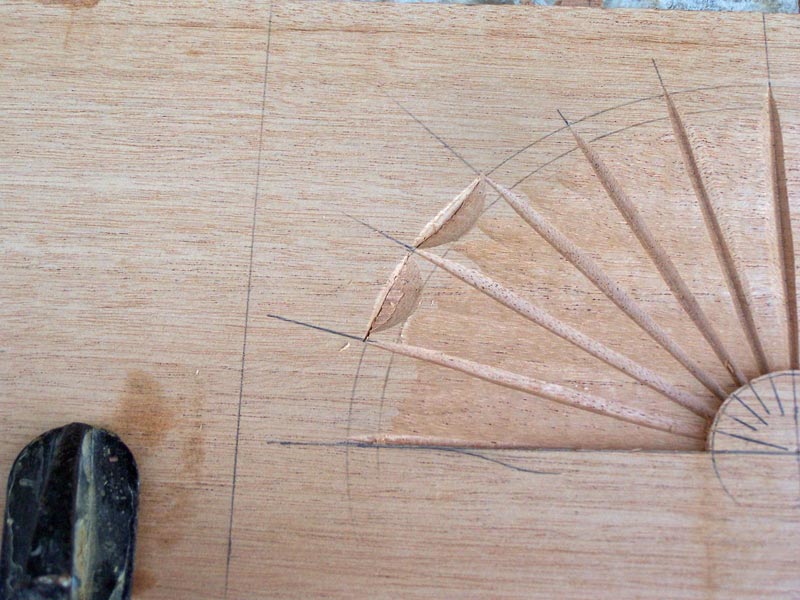
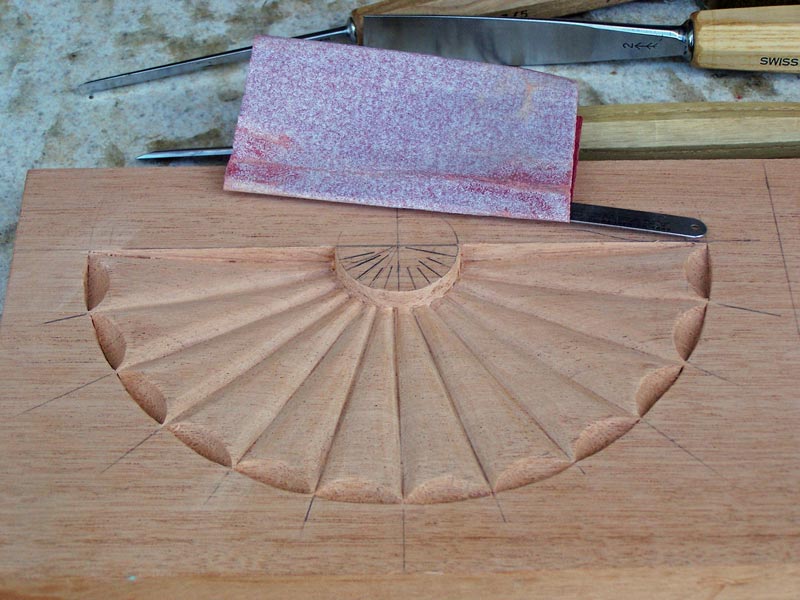
Next, we'll start on the scallops on the ends of the flutes. We have a problem here because the bottom of this cut is curved. I took a #2/8 and made the plunge cuts, with the cut in the center being deeper than the cuts on the side. You can slant your gouge when making the cuts on the sides to get a deeper cut on the inside than on the outside.
Now we cut the actual scallop. I'm using a #7/25. If you don't want your scallops to be as "bold" use a #5/25.
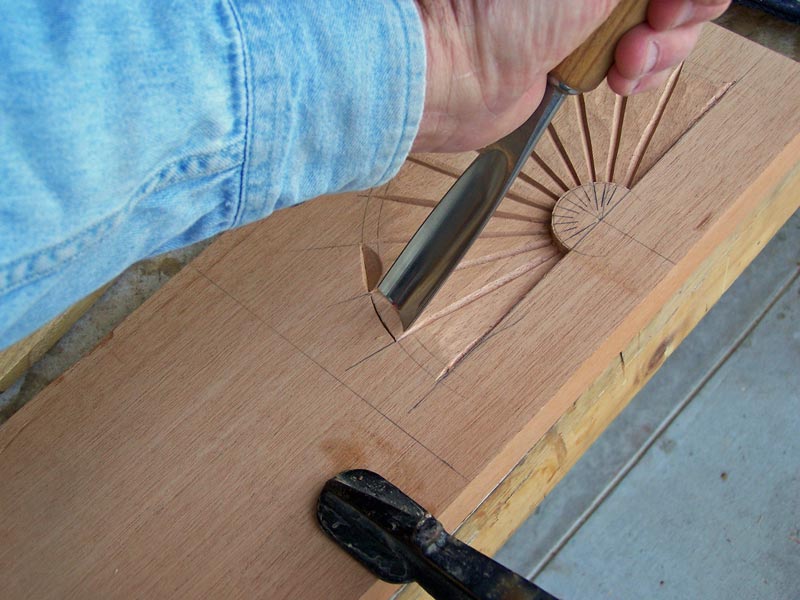
When you make these cuts, try to hold the gouge at approximately the same angle for each scallop. That's actually not hard to do because you naturally hold the gouge about the same each time.
Note that when you make this cut with the #7/25, the outside edges of the gouge will hit the plunge cut before the center of the gouge. You could modify a gouge by cutting back the sides, but that gouge would not be useful for other cuts - so we're going to make do with what we have.
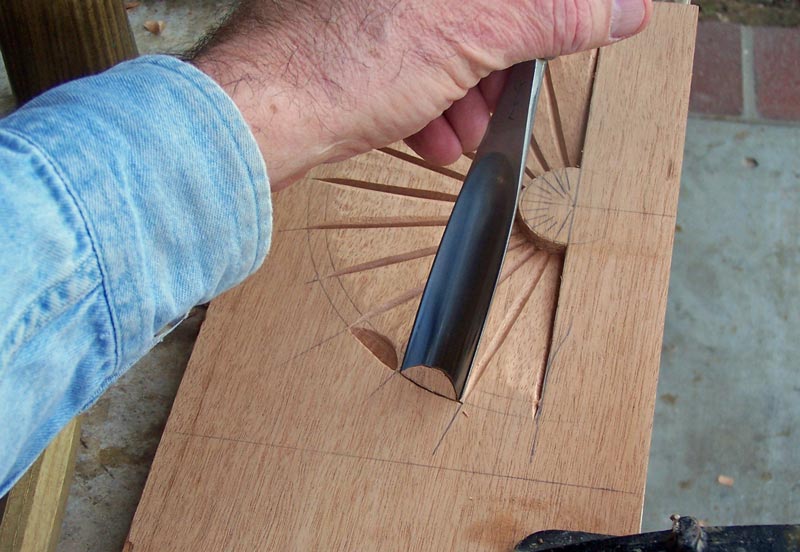
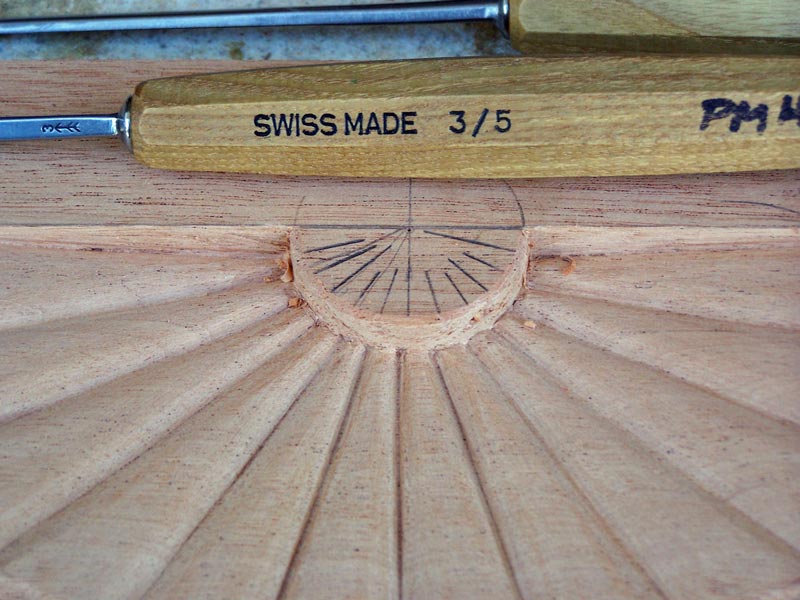
When you pop out the chip, there will be an area that has not been cut in the bottom of the scallop.
Use a small gouge - I used a #3/5 - to cut away the wood that was not cut by the #7/25.

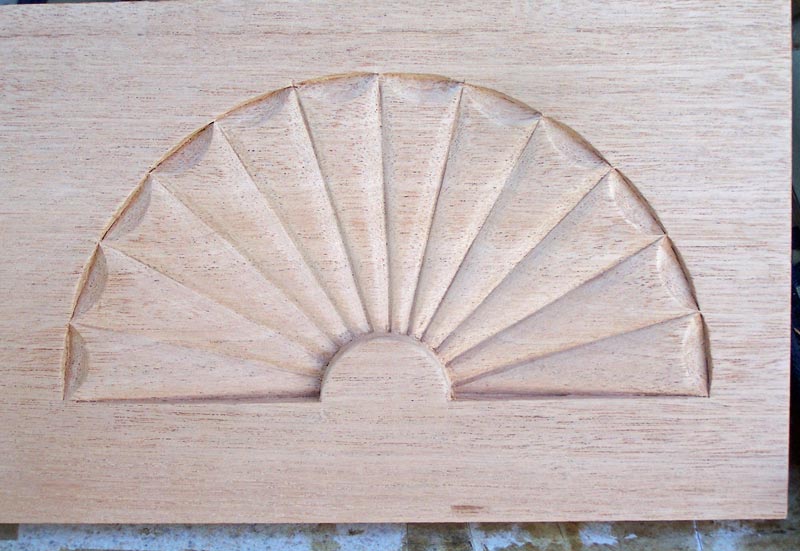
Do all the scallops.
We can now round over the flutes. You have to be careful in doing this because of the way the grain runs. On the top of each flute, I used the #2/8 and cut inward. But on the other side of the flute, I used the #2/25 and cut downward.
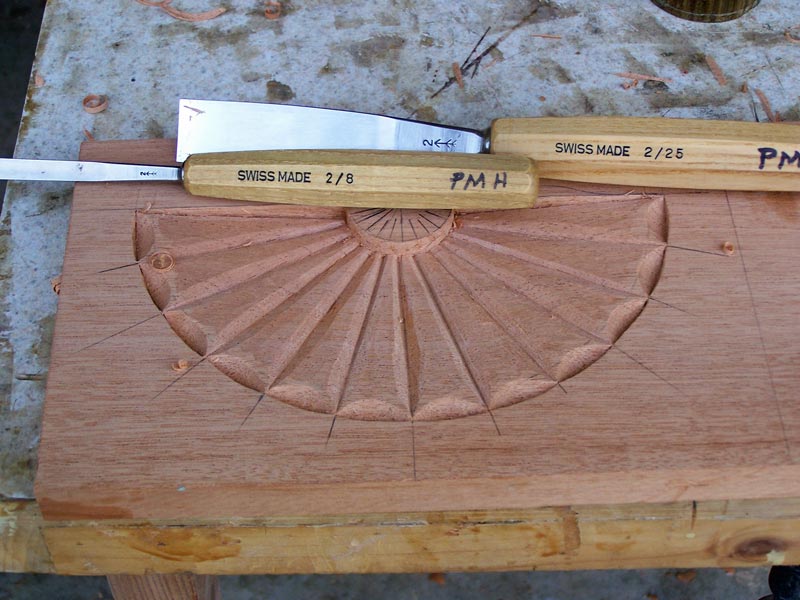
Once you have all the flutes rounded with the gouges, take some P150 sandpaper and sand the tool marks out.
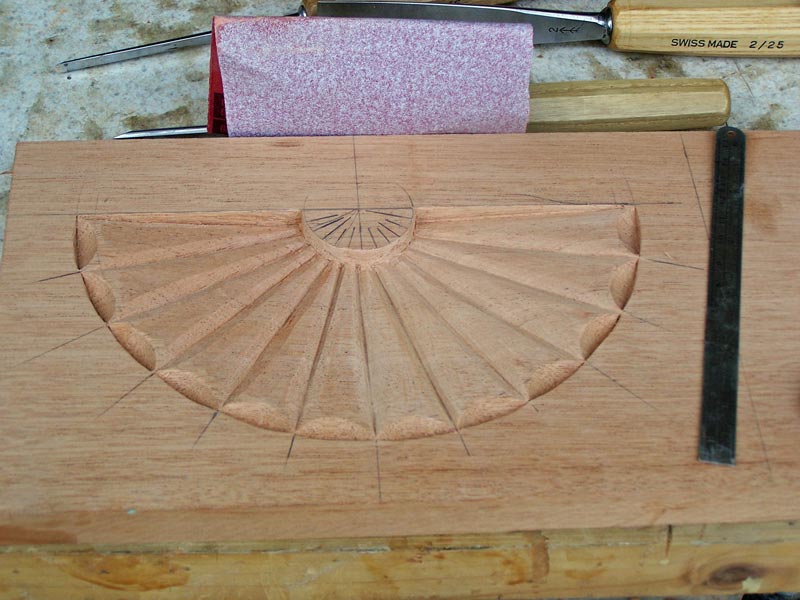
Sand all the flutes so that they're smooth.
Finally, trim back to the original line of the lower half circle, and round off the arris around the top just for looks. I used the #3/5 for that, and then sanded it.
The final step is to sand with fine sandpaper - P220.
Just to show what it would look like finished, I put some oil on it.
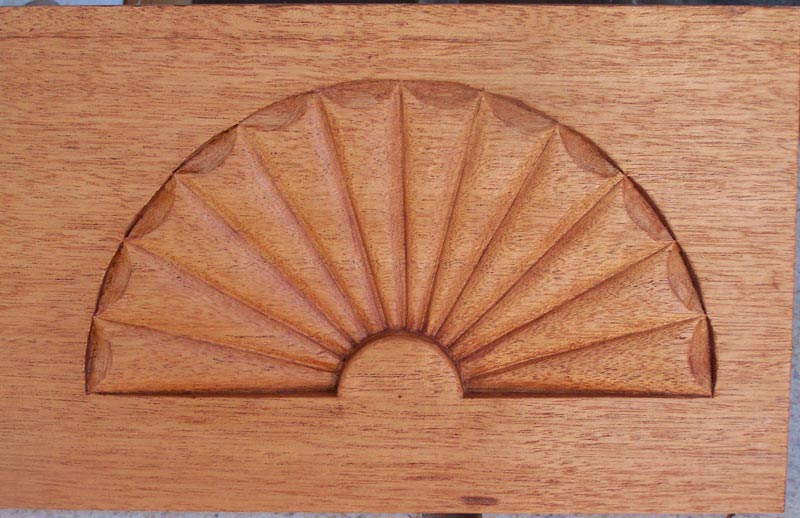
That's all there is to doing a fan. Although I used carving tools, you can substitute regular bench chisels and a carving knife for many of the cuts, so almost anyone can do a fan, even if you don't have a lot of carving tools.
You can see my woodwork here.