Rustic Chair
How I made it
6/11/2013 Some months back, a house in my neighborhood was being renovated and the homeowner put some things at the curb with a sign that said "Free". One thing was a header beam, about 5 1/2" by 9" by about 10' long. I had no idea what I'd use it for, but free wood is free wood, so I picked it up (with some help from my wife).

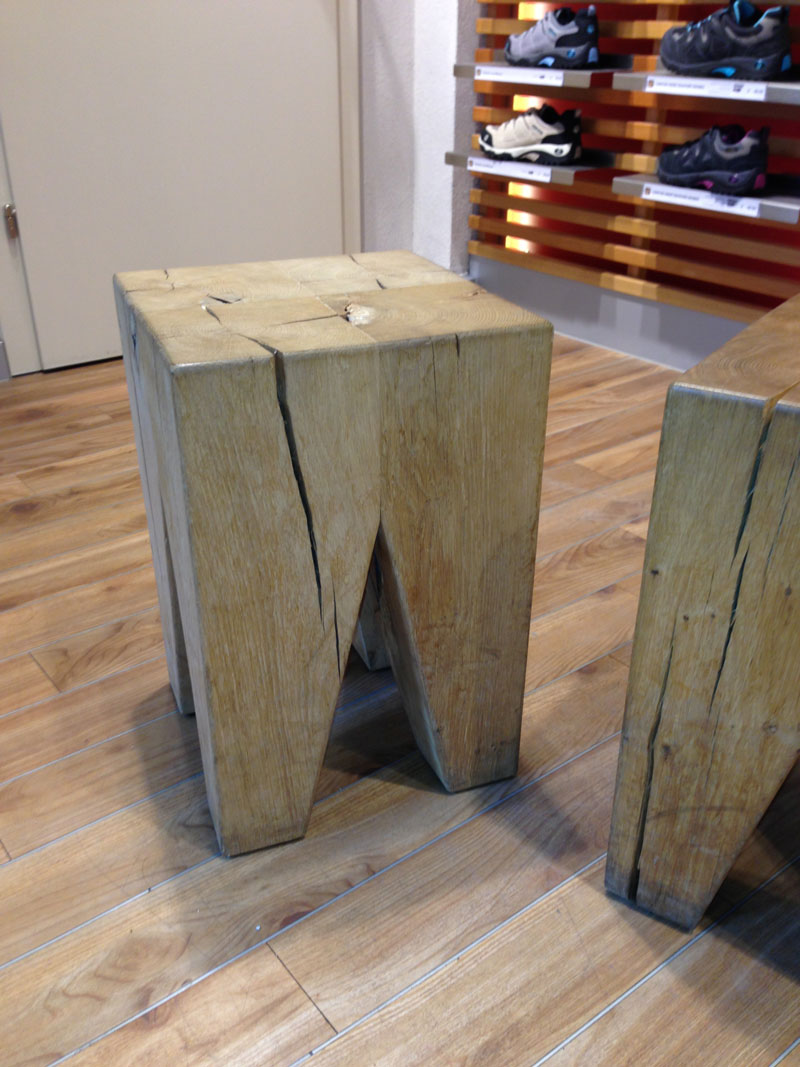
Recently, I was in Salzburg and went into a shoe store. In that store were two "stools" for people to sit on while trying on shoes. The stools were rustic, made from pieces of a large beam. I immediately saw what I could do with the beam I have.
After thinking about the project for a while, I decided to do a rustic chair with a back. The first part of the project was to do the bottom (seat) portion of the chair. I began by cutting off pieces and squaring them up so that each one was exactly the same size in width and height (length was only critical for the two short blocks).
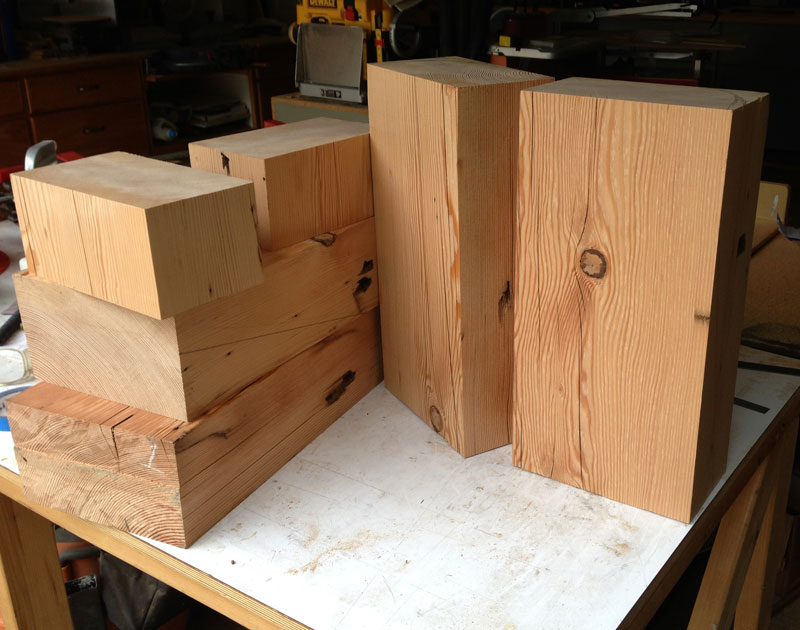
In this next picture, you can see how the pieces will go together. You can see some serious dings in the wood in this picture. When I got the beam, they had just cut the nails off flush with the surface of the beam. I had to make these dings in order to be able to get a channel lock pliers on the nails to remove them. I'll repair the dings later.

The next step was to cut the legs with a double bevel on my band saw. I wanted a certain pattern in the grain of the seat and that determined how the legs were to be cut (which corner would be the "leg").
Here you can see two legs cut and laid side by side. I used block planes to smooth out the legs - the band saw leaves a fairly rough surface. I glued up the seat in sections. First, I glued each of the two leg pieces together, as shown in this picture. Then I glued the center blocks to one set of legs, then the other set of legs to the assembly.


The next step was to begin shaping the seat. I wanted the corners rounded and the back narrower than the front. In this picture, you can see one side - front and back - where I've rounded the corners (the front is to the left of the picture and the back is to the right). I took the back in by taking a fair amount off the side. I used a hand held power planer to remove the bulk of the wood but went to spokeshaves to do the final fairing out. It would have been a lot of wood to remove by hand methods, alone. After I had one side the way I wanted it, I made a cardboard pattern and transferred the curves to the other side.
Note the significant number of dings in the front. At first, I was going to leave them as part of the "rustic" theme of the chair but decided to set in a patch on each one.
You can also see, in this picture, the grain pattern I chose for the seat. I was going to do a "sculpted" seat but my wife pointed out that any depression in the seat would act as a rain collector. She advised making the seat flat and using a cushion on it when in use, so that's what I decided to do. I'll use some outdoor finish on the seat to seal it against water.

And here's the seat portion pretty well finished, including with the dings patched.

Here's a close-up of the patches. It's impossible to match the grain pattern but I tried to come close. There are four patches in this picture.

I'm going to make a coopered seat back and mortise it into the seat. More pictures when I get that done.
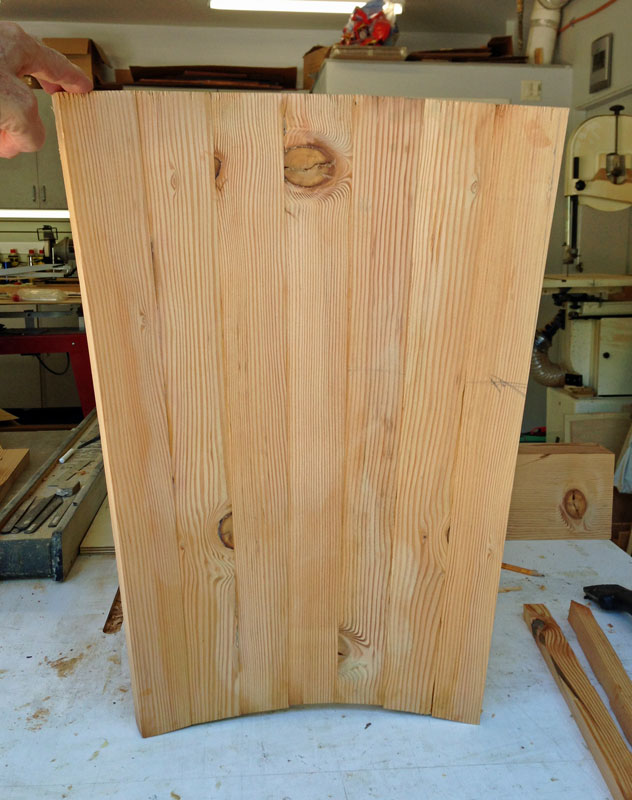
6/13/2013 Here are a few pictures of the making of the back for the chair. The back will be coopered, with the top wider than the bottom. I began by drawing an end view of the bottom, full size. This helped me decide how many staves to use and the angle between the staves. I went with seven staves, with the top of each stave 1/2" wider than the bottom. The cut angle wound up being 2 degrees, which meant that the angle between two staves was 4 degrees.
To make the staves I cut one side of a board at 2 degrees, then used a taper jig to cut the stave to a taper, and at the same time cutting the 2 degree bevel. The only tricky part was to make sure that the bevel on both sides went the same way. I wrote "back" on the stave and knew that the back had to be up when making the cuts.

Here's a picture of five of the staves, cut and read to go to glue up. I had one or two not fit together well so I went back to the table saw and jig and took a very light cut to true them up. The fact that one or two staves were a tiny bit smaller doesn't matter.

I glued the staves up one at a time. That is, I started with two staves, then when the glue was cured, I glued one more on. I don't know how you'd do all of them at one time.
I used cauls on the end to keep the clamps from damaging the staves (dinging them from the clamp pressure).


And here's the seat back fresh out of clamps.
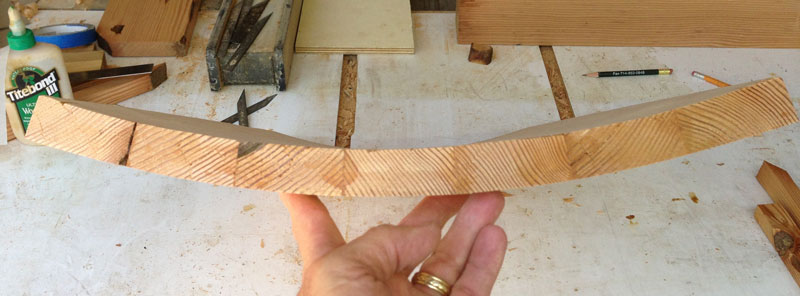
Looking at it edge on, you see that it's not a smooth curve, either on the front or the back. The more staves you use, the easier it is to smooth the curve.

Smoothing the back was easy. I used a jack plane and planed down the high points, which were where the staves met, then sanded with a power sander.
Smoothing the front (inside) was more difficult. I used a chairmaker's plane and planed across the inside face. A chairmaker's plane is a fairly rough tool, similar to a scrub plane, so I had to take light cuts and then sand the face with a power sander.
Here's what it looks like finished.

And edge on. The smoothness of the curve, both front and back, is not really obvious in this picture but both sides are now fair curves.
And here's what it looks like on the seat. I now have to mortise the back into the seat. This will be a trick because the curvature of the back flattens out as you go up on the seat. Making the mortise so that the back is tight in the mortise, especially at the face of the seat, will be a challenge.

6/15/2013 Here's the finished chair. I mortised the back into the seat and applied a wipe on poly finish. The back is at 13 degrees to the seat. I was going to cut the back legs to make the seat slant backwards but my wife pointed out the because of the coopered seat, water would collect at the seat back. So I left the seat flat.
It was a fun project.

Return to my main page by clicking here