Project Gallery
P. Michael Henderson
Here are pictures of some of my projects. They're approximately in reverse chronological order.
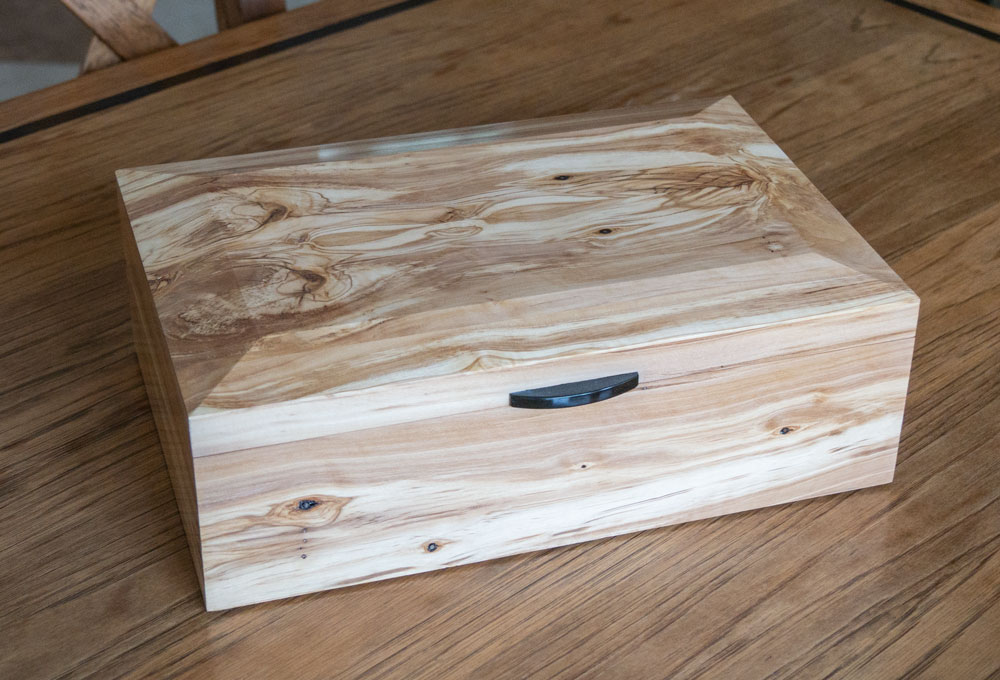
A few years ago, we had to have our olive trees removed. They had become infected with some virus that would slowly kill them. I took some of the larger pieces and sawed them into boards and then put the boards into our attic to dry. This year, I removed a few pieces and decided to build a jewelry box out of it. The wood had cracked internally so I filled the cracks with epoxy.
The wood is dense and heavy. It made an interesting box.
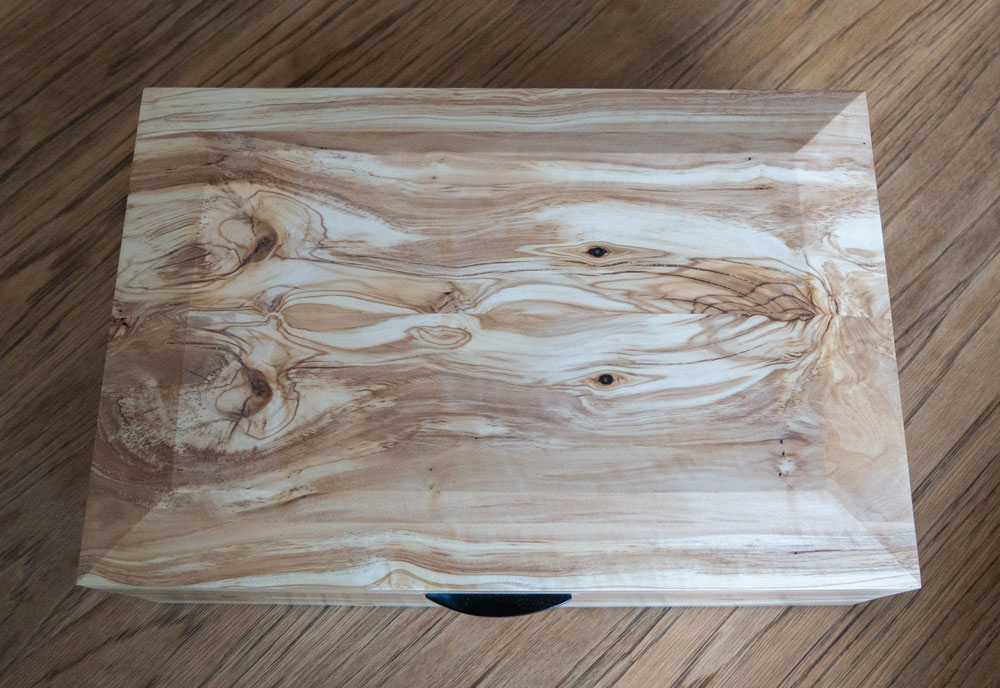
Here's the top. I thought the grain figure was interesting. I made the top from a board that I resawed. Some of those lines you see are the cracks that I filled.
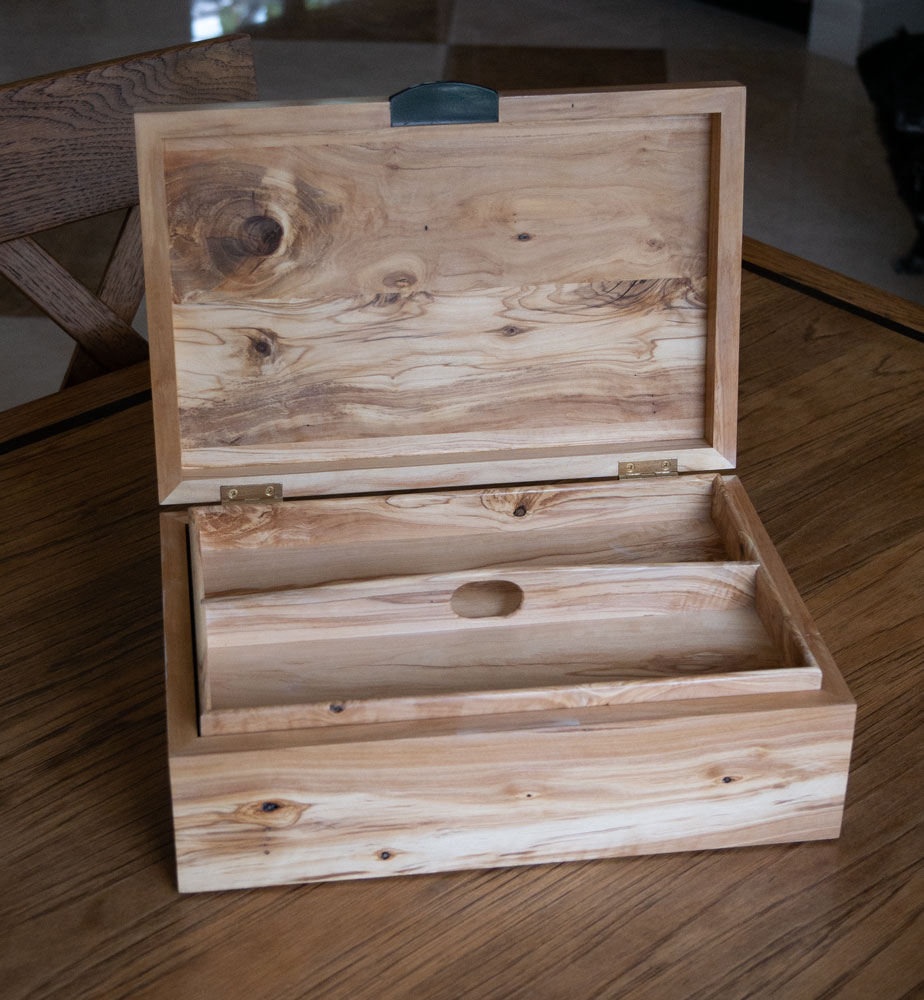
Here's a view of the interior, showing the tray. It took me a long time to make the box because of the difficulties in the wood.
Our old refrigerator died and we had to buy a new one. The old one had frame and panel doors to match the rest of the kitchen so we bought a refrigerator which required new frame and panel faces. I selected some nice figured cherry for the doors and made the panels for it. I was pleased with the way it came out.
Judy found some interesting handles from "Top Knobs".


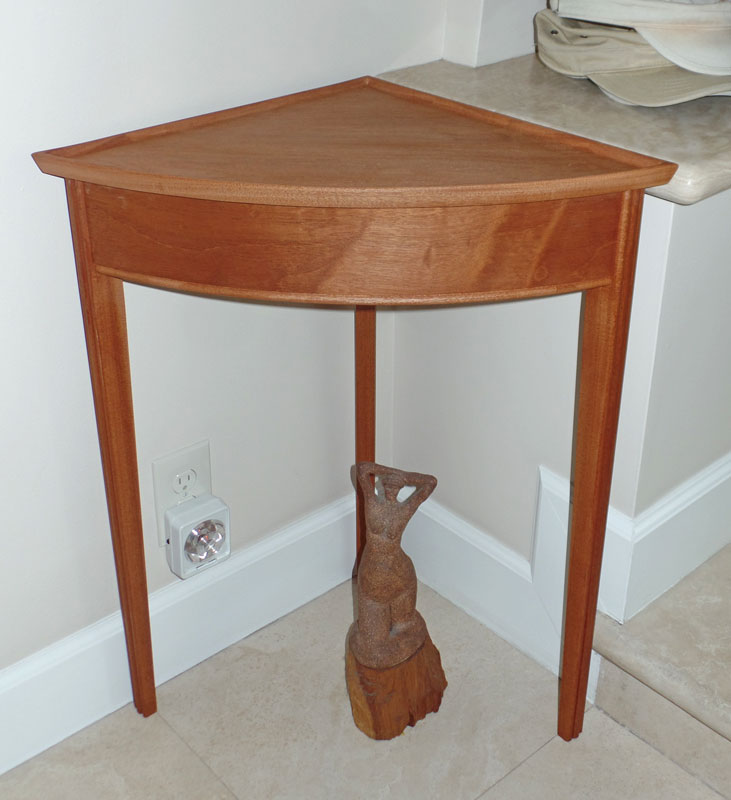
My wife, Judy, wanted a corner table for a certain place in our house. This is the table I made for her.
I fluted the two front legs"
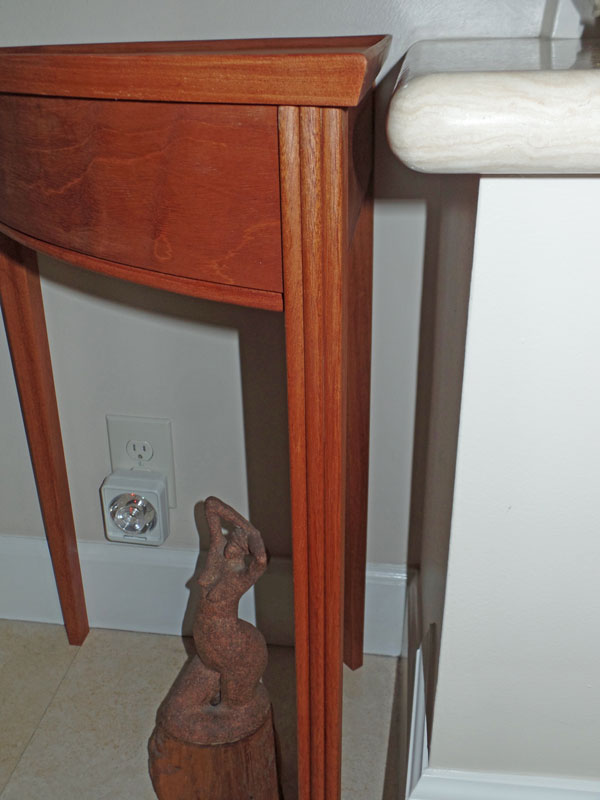
And here's a close up of the "serving tray" top. I had to route out some of the wood to get the lip around the top.

A while back, someone gave me a bunch of aromatic cedar. While I always like to get free wood, it was taking up space in my shop and getting in my way. Judy, my wife, suggested that I use it to make her a blanket chest, and that's what I decided to do with it.
The basic structure is the aromatic cedar, with figured mahogany veneer covering it on the outside. The base is solid mahogany. The hinges are some I found at Rockler. They hold the lid at any angle and don't let the lid drop - you have to push the lid down to close it.
It's 36" wide, 17 1/2" front-to-back, and 15" top-to-bottom inside.
Here's a view from the front:
![]()
A front quarter view to show the side:
![]()
And a view inside to show the aromatic cedar.
![]()
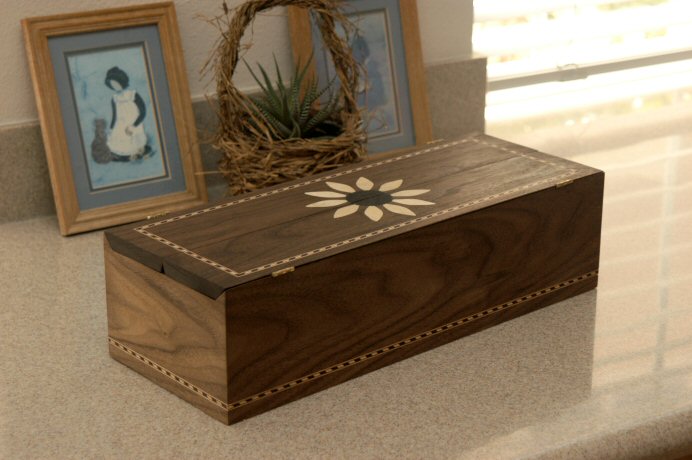
My niece asked me to make her a box of a certain size. I chose to make a serpentine top from figured walnut. The handle is ebony.

Here's a view of the interior. It has a removable tray in aromatic cedar.

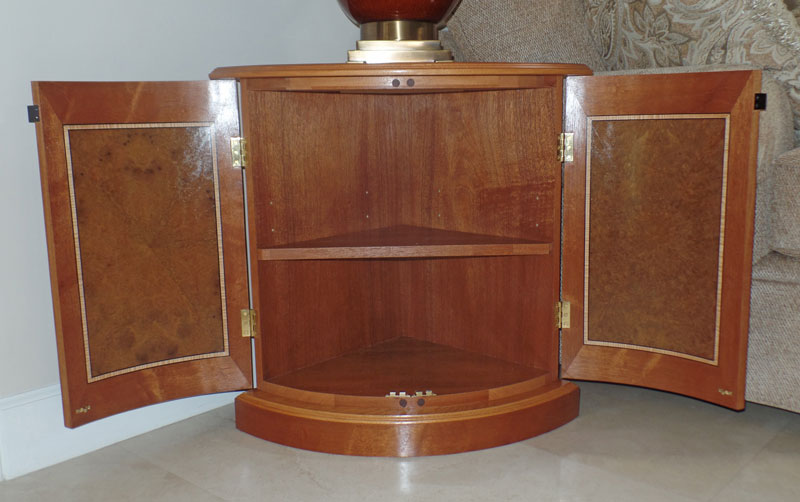
I made this corner table for my wife, Judy. It's in mahogany with walnut and laurel veneer. The doors are coopered, with walnut burl laid in a four way match with figured maple as the banding.

The top is walnut crotch veneer with holly stringing bordering it.

The inside of the doors is laid with laurel burl in a radial pattern with figured maple banding. The shelf can be adjusted for height.
Here's the cabinet I made to house the trays shown below. The trays fit into the bottom section and the upper section houses the TV components. It's a bit complex to explain so I'm going to include several pictures. Here's a view of the closed up box with the TV sitting on top if it.

The top section holds the equipment for the TV (DVD player, set top box, etc.). The back is open for ventilation.
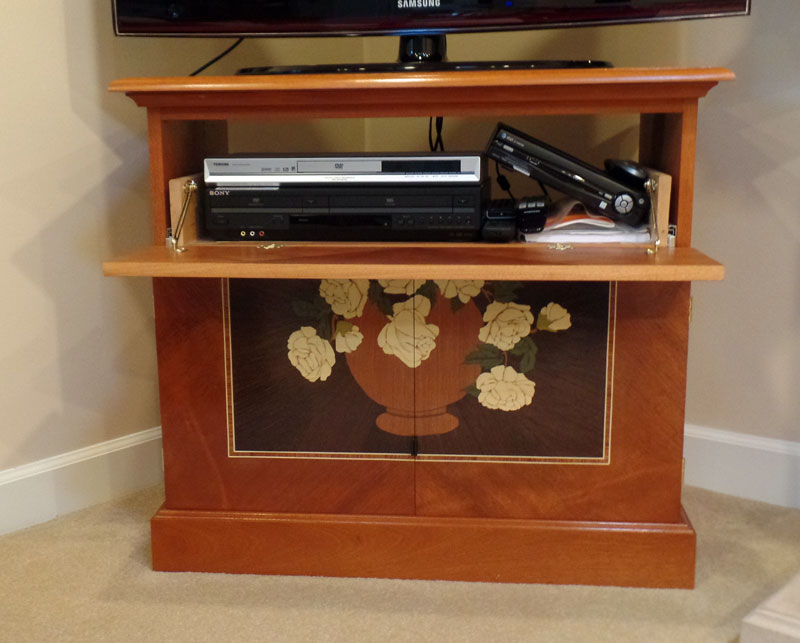
The lower section holds five party trays, each made from a different wood and with a different marquetry design.

Here's one of the party trays removed. When having a party, it's very nice to be able to pull these out for people to put drinks and snack plates on.
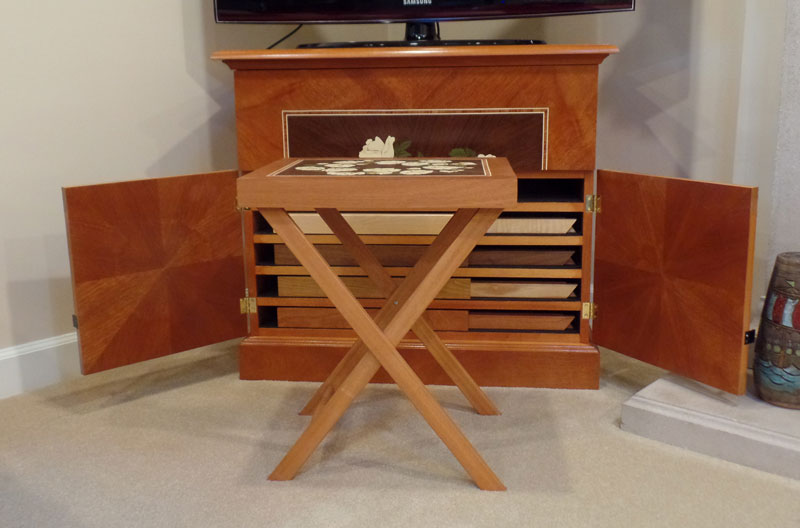
I made five folding party trays to go into a cabinet. Here are four of the trays.

And here's a view from the side to show how they're made.

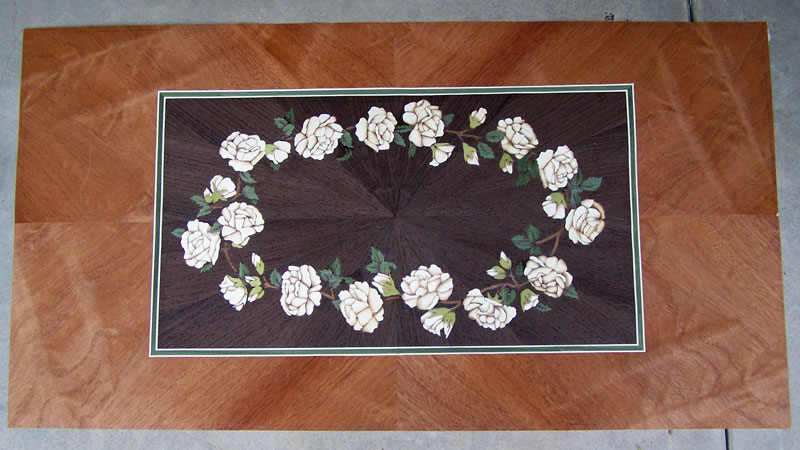
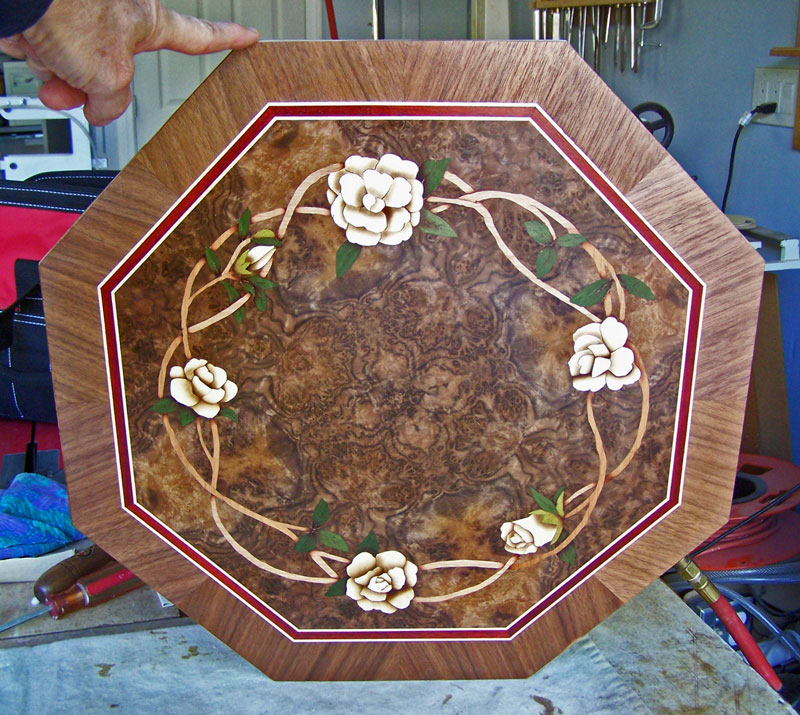
I made this coffee table for my wife, Judy. The marquetry consists of about 400 individual pieces.

Here's a close up of the bottom panel (in progress).
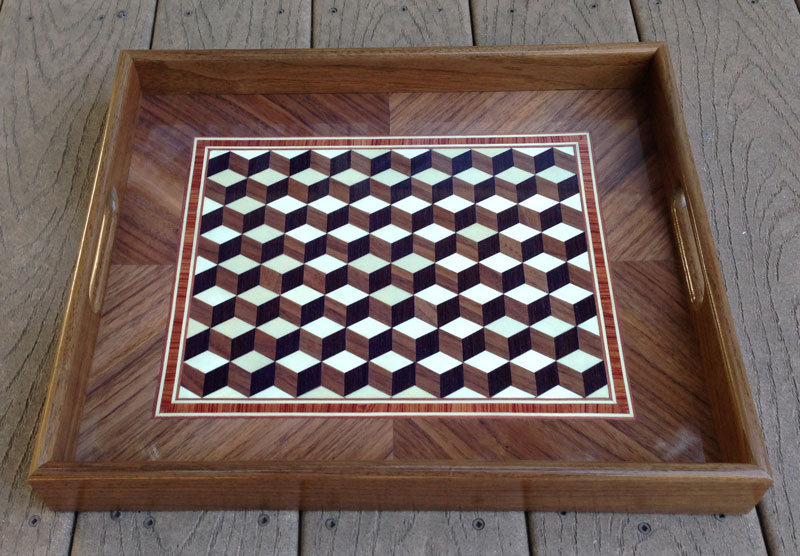
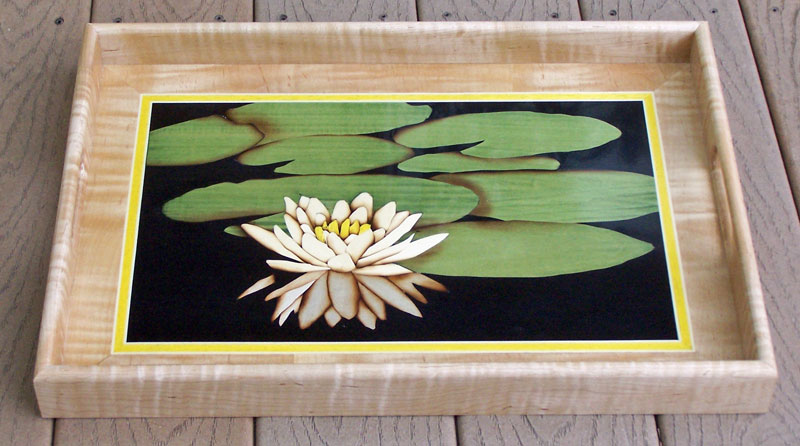
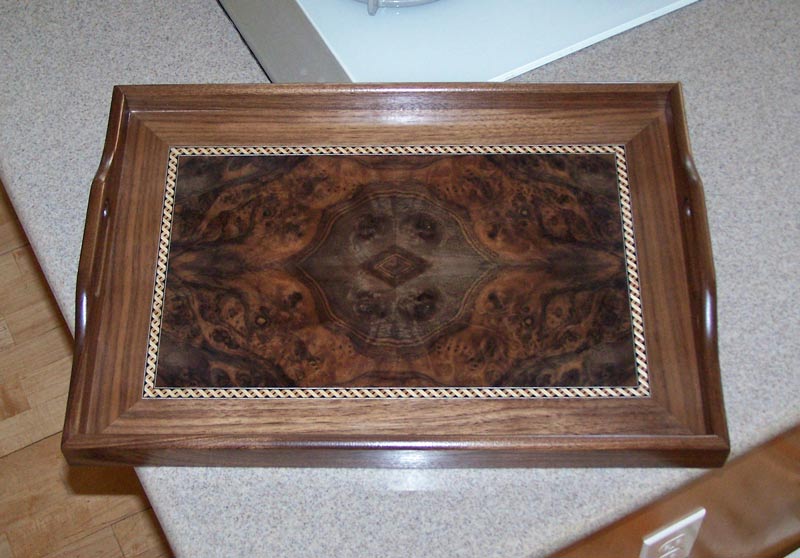
Here's some more marquetry trays.

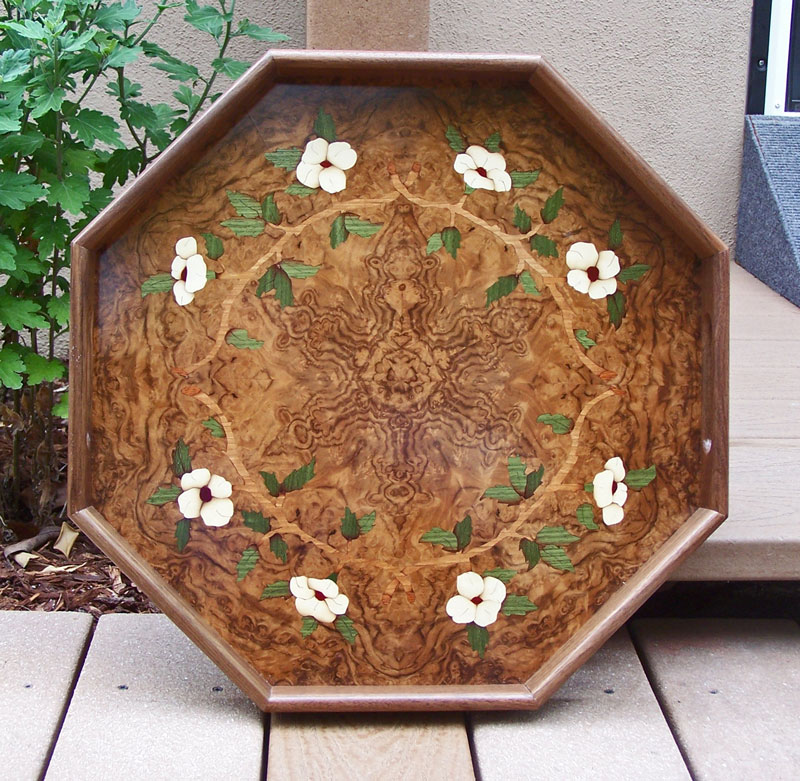
Here's a panel on the way to becoming a tray. The tray was purchased by the OC Fair for their permanent collection.

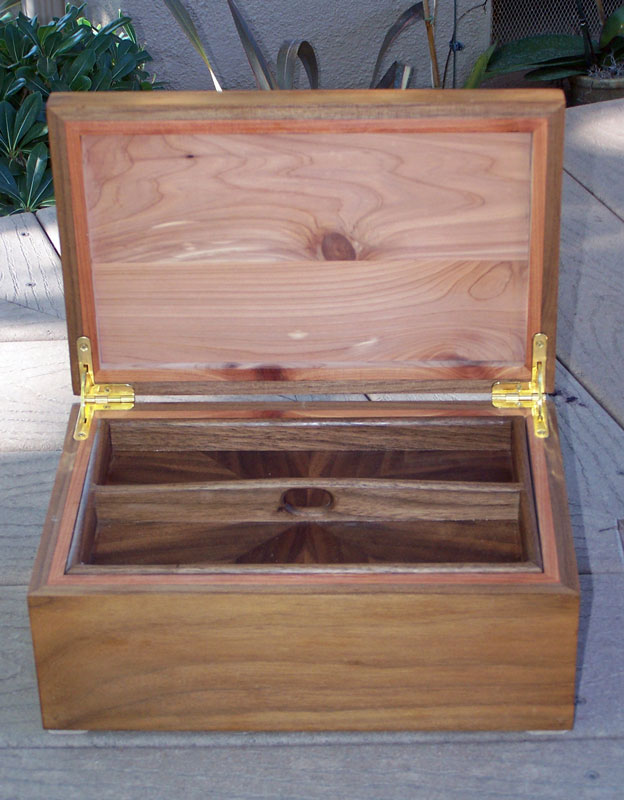
I've made a number of jewelry boxes over time. Here's one.

I did the following two panels in Paul Schurch's class. The class was a week long and it was pretty intense.
Here's another marquetry tray I did prior to taking the class.
I took a marquetry class with Paul Schurch. Here's the first marquetry tray that I made - it was done before I took the class, but was the project that Paul had on his marquetry DVD.

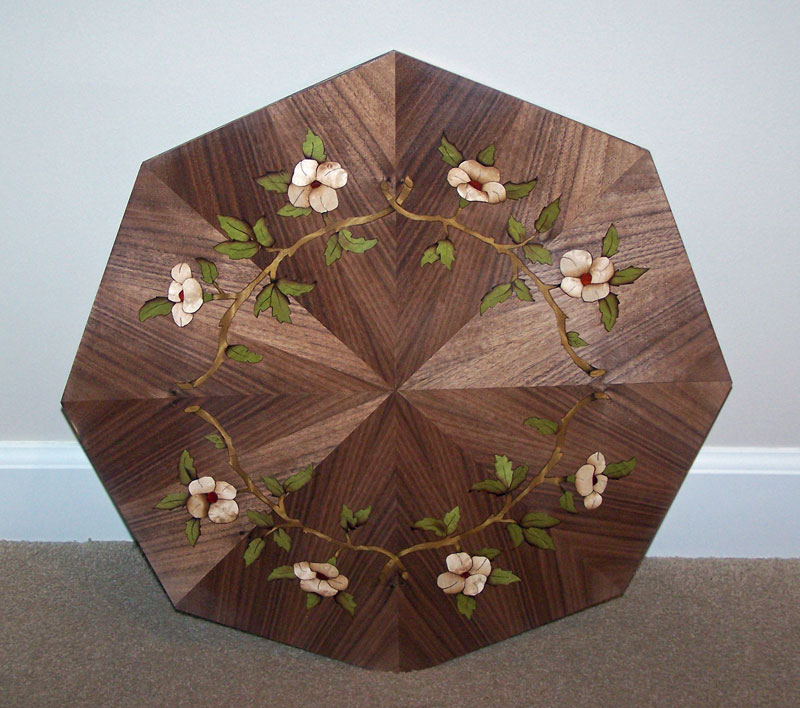
Over the years, I've made a lot of serving trays. I like to do them because it allows me to experiment with different veneer designs - and still produce something useful. This one is a four way match of walnut burl.
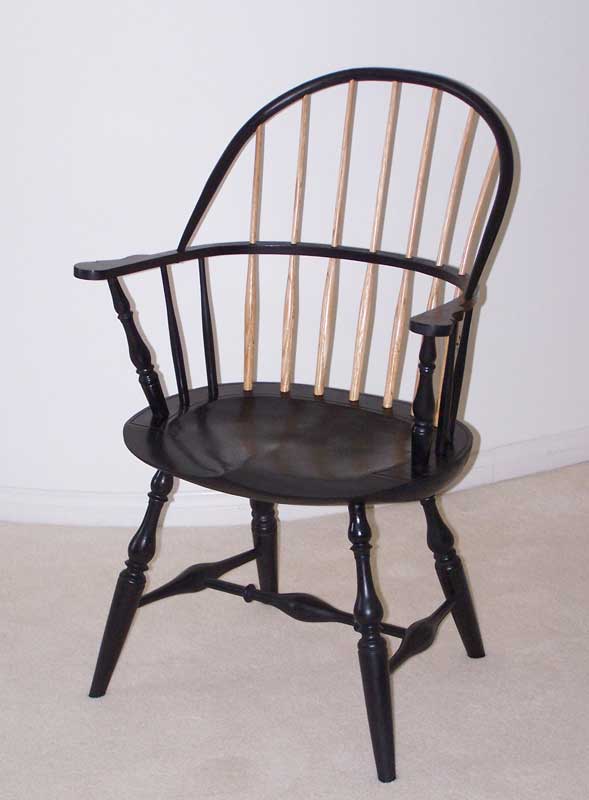
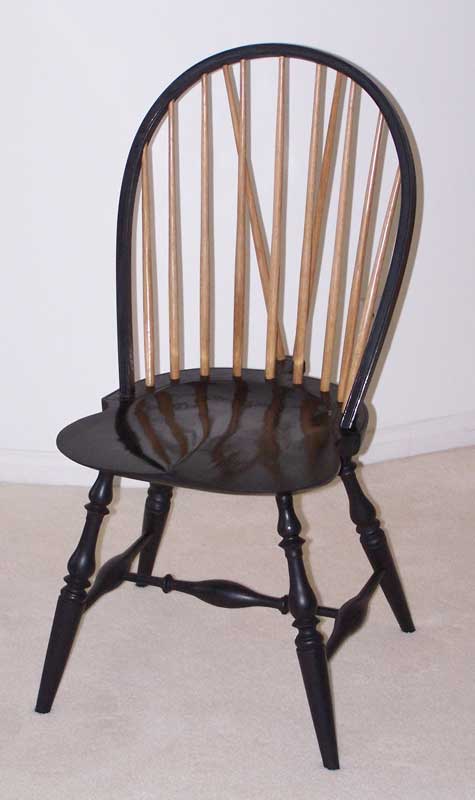
I made a couple of Windsor chairs in a class that I took. But I've never really been a fan of Windsor chairs so I eventually gave them to a family member.
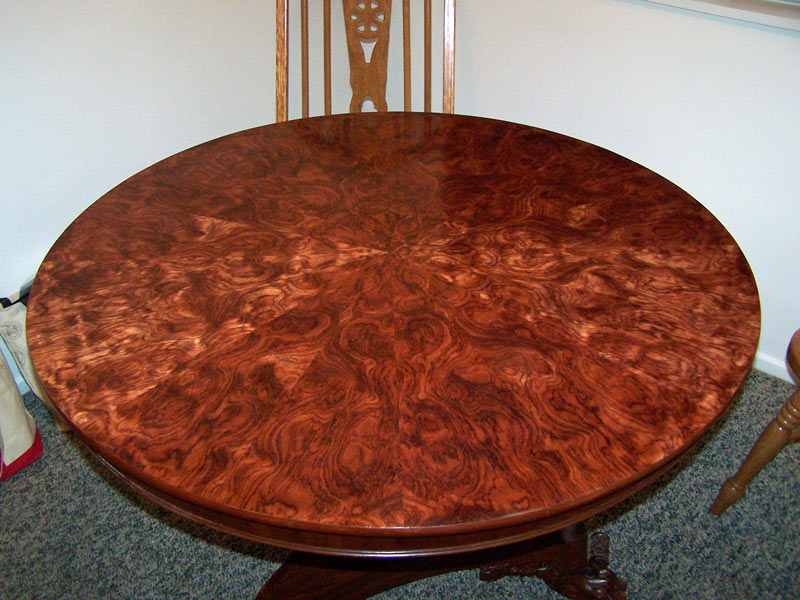
A couple took my veneering class with the idea of veneering the top of their antique table. However, once they recognized the complexity and the equipment that would be required, they asked me to do the job for them. Here's the top that I veneered with waterfall bubinga. It's laid in a radial match.
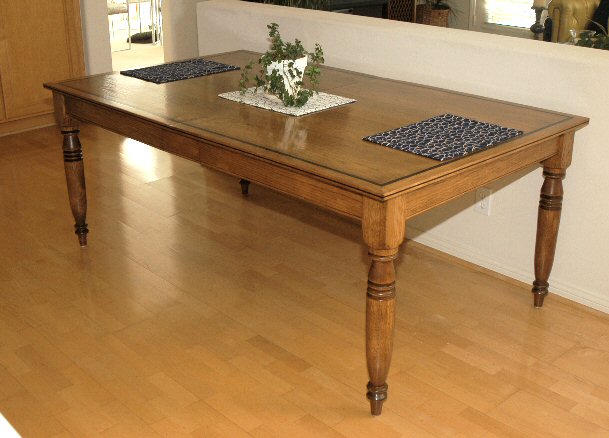
A friend asked me to make a kitchen table for her. It's a bit smaller than a normal table because it had to fit into the space she had for it.
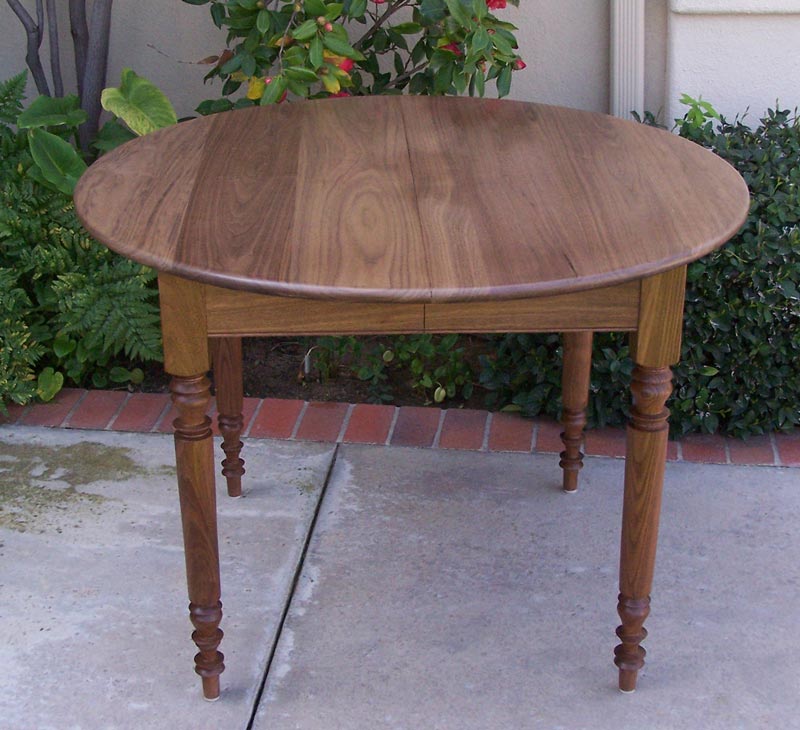
And with the two leaves put in.
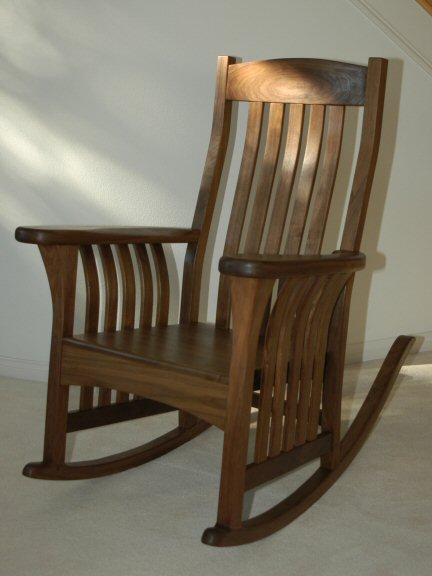
I made several rockers, all along the same style. The pictures are in reverse sequence. The newest one is in cherry.

The next two are in walnut.

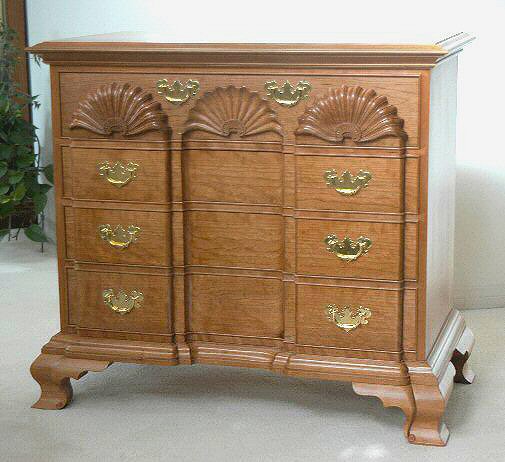
I've always been attracted to Queen Anne furniture and decided to make a chest of drawers based on one made by John Townsend in Newport, just before the American Revolution. There was a lot of hand work in this project.
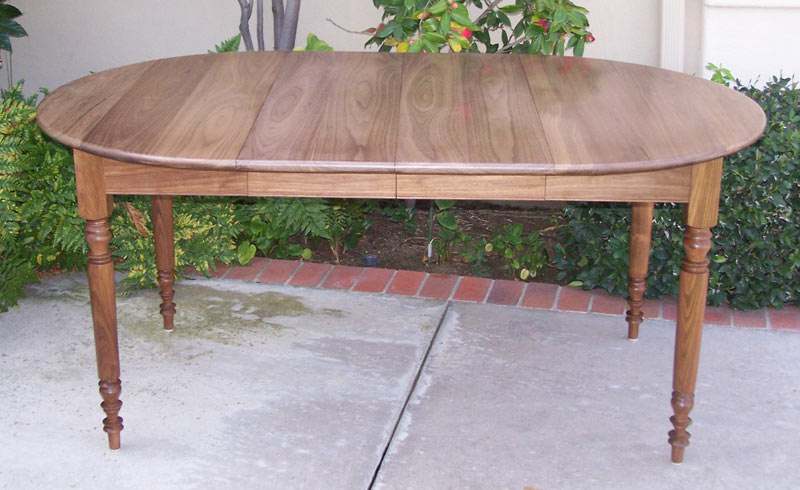
I made an expanding kitchen table. It's self contained, meaning that there are no leaves that have to be stored separately from the table. The wood is pecan.

Here's the table expanded to full size. It will seat six in this configuration.
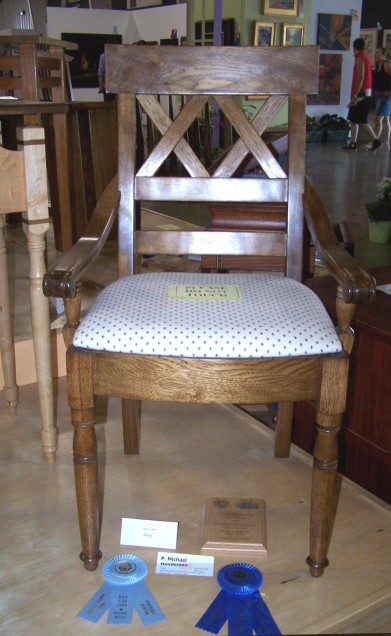
We wanted to replace the kitchen table and chairs that we had so I made a set of four chairs. I call them "Dos Equis" chairs because of the two X's on the back. I showed them at a local woodworking show and won an award.
I built this pergola and swing for our back yard.
.jpg)
Here's a closer view of the swing.
.jpg)
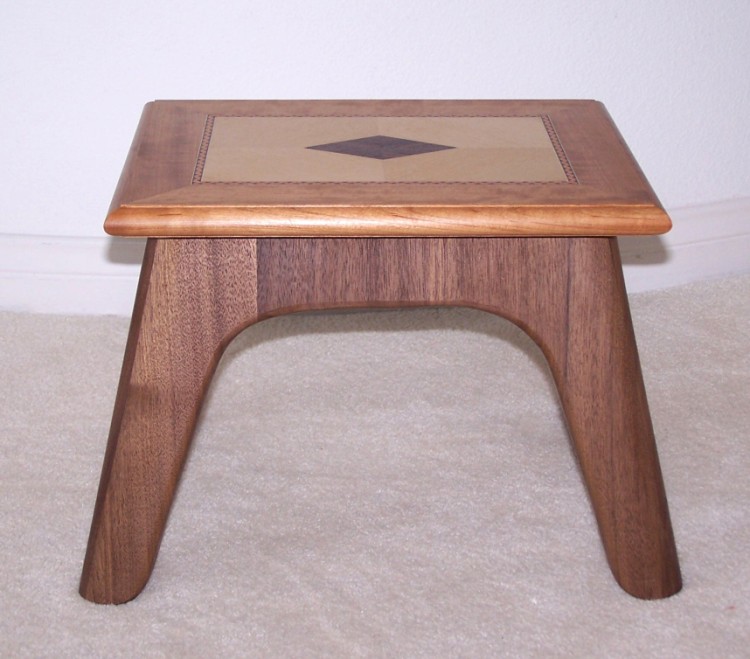
I made this stepstool for my wife. From a woodworking point of view, the complex part is that the legs splay out and are mitered. The challenge was getting the right angle for the corners.
Here's a turning and carving project that I did to show my carving students what they could do with the simple flower that I teach them to carve.

This is a box I made for the local garden club. It was an early project in my woodworking.

You can return to my main web page here.